Introduction: Creating Materials for Expressa Configurator
To create new materials in Expressa Configurator, it is essential to generate texture maps using external tools such as Adobe Photoshop, or Substance 3D Sampler. These maps must be seamless and have dimensions of 2048 x 2048 pixels to ensure compatibility and high-quality rendering in the configurator.
We will guide you through the process of creating a seamless fabric pattern using Adobe Photoshop, which will serve as the foundation for your texture maps. Let’s get started!
Preparing Material Textures for Expressa Configurator
We usually start with a photograph of a material as the foundation for creating texture maps that will be used in Expressa Configurator. These textures represent fabrics, leathers, stones, metal plating, and more. In all cases, it is essential to begin with an image of the material’s surface and ensure it becomes seamlessly repeatable in all directions.
The first part of this tutorial will guide you through creating a base color texture, which serves as the foundation for any material. The process for generating additional maps like Normal, Roughness, or Ambient Occlusion will be covered in the next tutorial (linked at the bottom of the page).
Creating a Seamless Fabric Pattern with the Filter > Offset Tool
Follow these steps to turn a fabric image into a seamless, repeatable texture using the Filter > Offset tool.
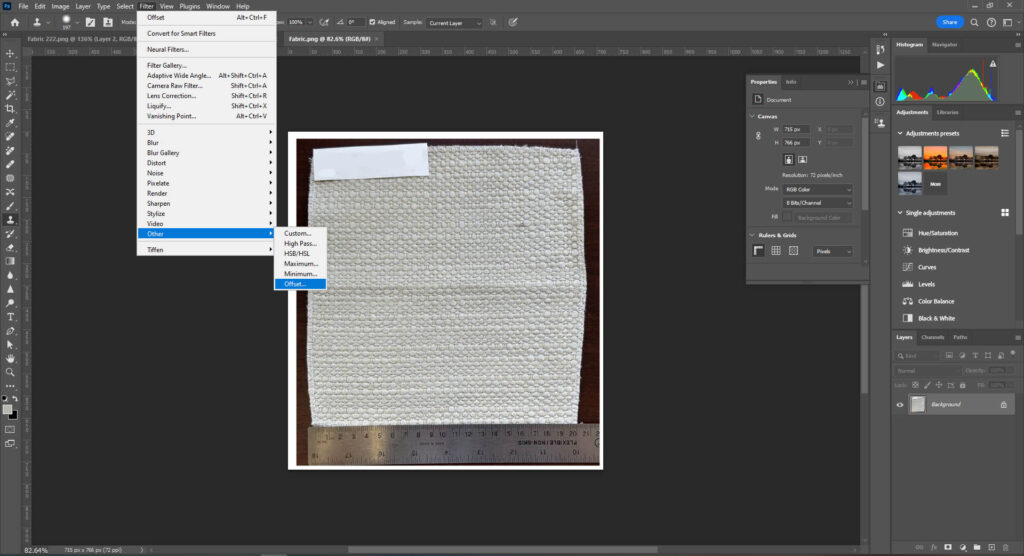
Step 1: Prepare Your Image
- Open the image of the fabric material in Photoshop
- Crop the image to remove any unnecessary edges or elements. Ensure the image captures the pattern you want to make seamless.

Step 2 Use the Offset Tool
- Go to the Filter menu and choose Offset.
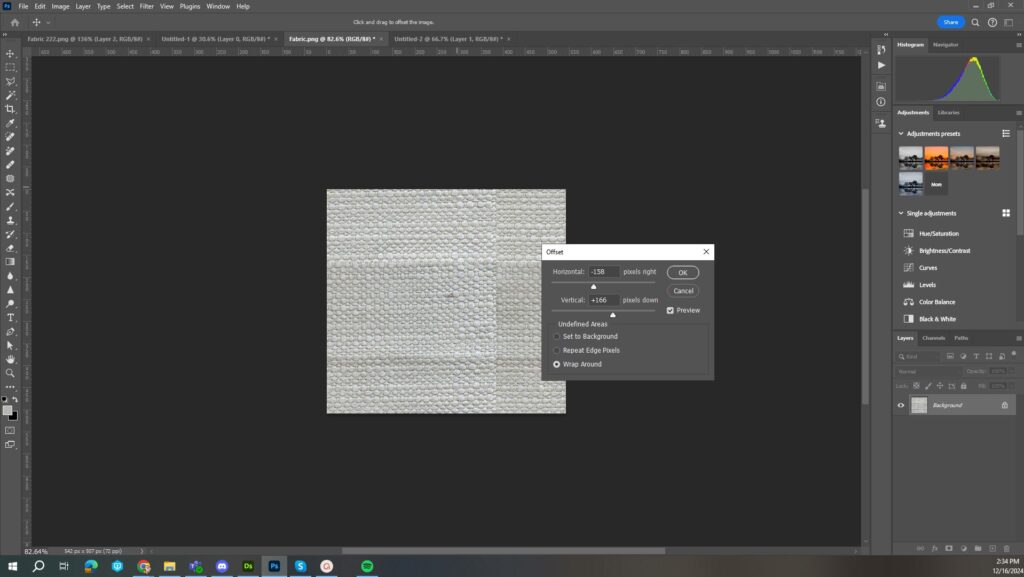
- In the Offset settings:
- Set the horizontal and vertical offset values to reveal the seams in the texture, allowing you to easily identify and edit them using the Clone Tool to create seamless transitions.
- Ensure the Wrap Around option is selected.
- Click OK. This will shift the image and create seams in the center of the artboard.

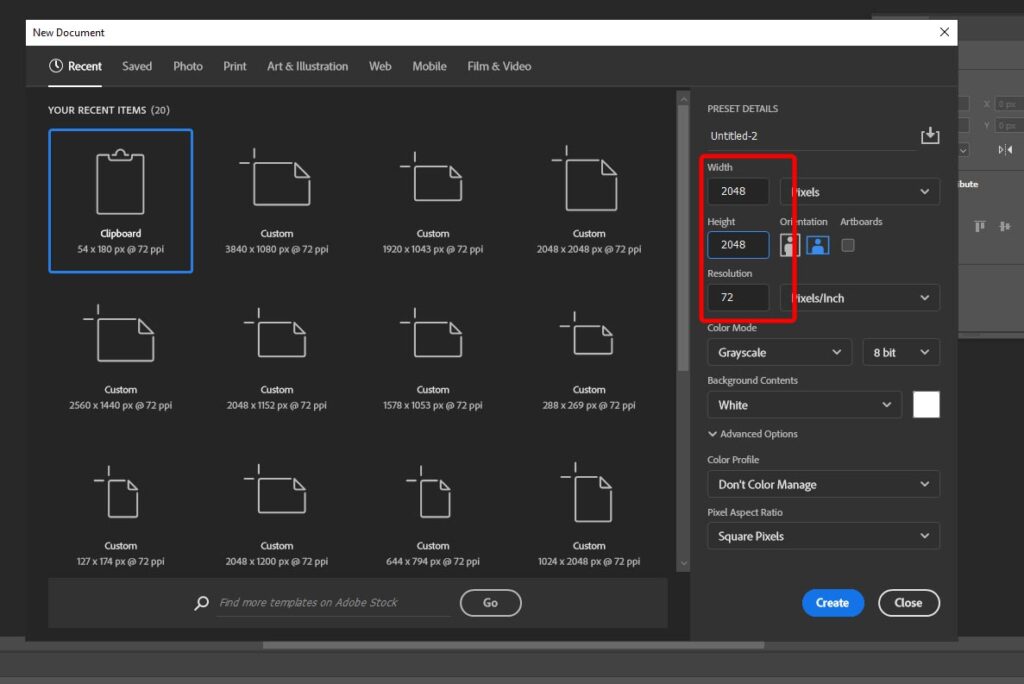
Step 3: Set Up a New Artboard
- Create a new artboard with dimensions 2048 x 2048 pixels.
- Paste the cropped fabric image onto this new artboard without modifying its original size.
- Duplicate the cropped image as many times as necessary to completely fill the artboard. Ensure the images are aligned seamlessly.

Step 4: Seamlessly Blend the Edges
- Use tools like the Clone Stamp, Healing Brush, or Content-Aware Fill to remove the visible seams.
- Carefully blend the edges where the image was offset to ensure a smooth, seamless transition.
Step 5: Test the Pattern
- Duplicate the artboard or copy the image.
- Repeat the pattern by tiling the 2048 x 2048 design multiple times in a larger canvas.
- Verify that the texture repeats seamlessly in all directions.

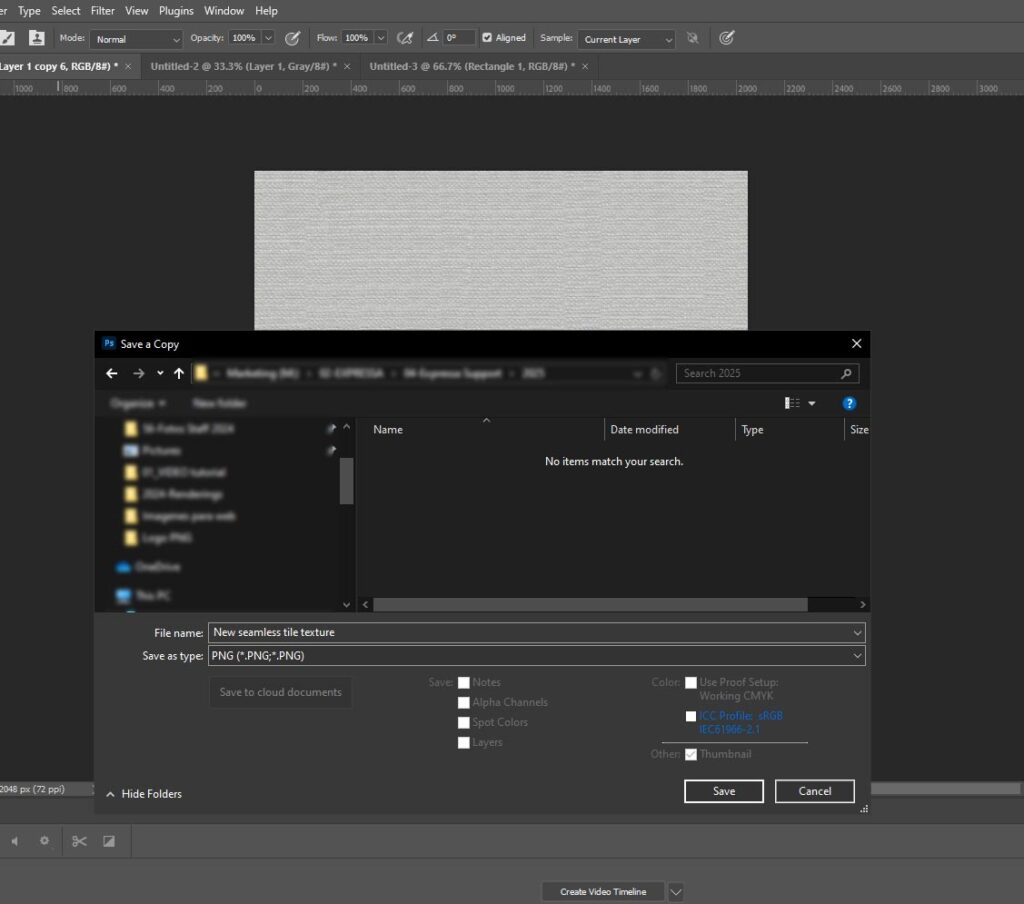
Step 6: Export the Pattern
- Save your 2048 x 2048 texture as a high-resolution image file by following these steps:
- Press Ctrl + Alt + S to open the Save As dialog.
- In the file format options, select PNG, as Expressa Configurator requires maps always to be saved in PNG format for reading.
- Choose your desired destination folder for the file.
Watch the Video Tutorial to Create Seamless Tile Textures
Important Note on Creating Seamless Textures
We understand that learning to create seamless, repeatable maps takes a reasonable amount of time and adaptation. Depending on the complexity of the map, various tricks, tips, and tools can be applied. There is no single recipe or formula for creating the best seamless textures, which is why we recommend exploring different tutorials on seamless textures in Photoshop. To help you get started, we suggest the following resources:
- Turn Any Texture Into Seamless Pattern in Photoshop!
- How to make a seamless texture in Photoshop 2023
- How to Create Seamless Texture In Photoshop : tricks for 3d renderings
Continue to the next part of the tutorial to learn how to create Normal Bump, Ambient Occlusion, and Roughness Maps.